
Why I Stopped Using Stock Photos and Started Generating Images with AI
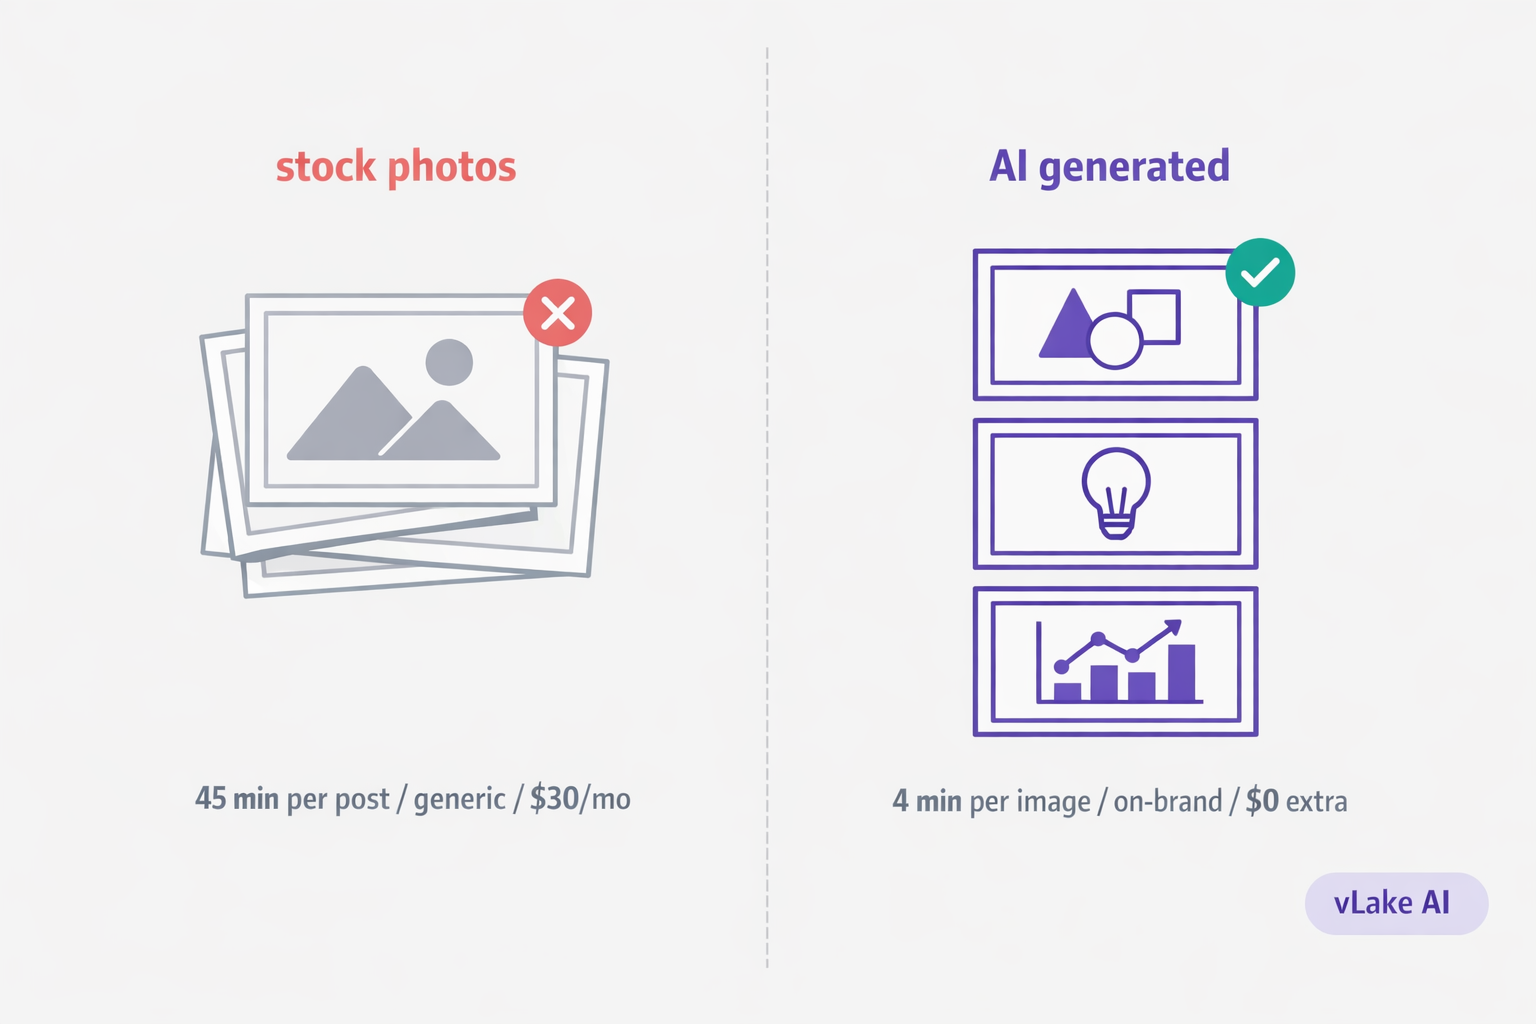
I was spending 45 minutes per blog post just finding the right stock photo. Browse Unsplash. Try Pexels. Search three different terms. Scroll past 200 results that are close but not right. Download one, resize it, upload it, write the alt text. Repeat for the featured image and two in-article graphics.
That was my workflow for every single post. 45 minutes of image work on top of the actual writing. For a blog that published twice a week, that added up to six hours a month just sourcing visuals that I was never fully happy with anyway.
Then I started generating images with AI. The 45 minutes became zero.
The Stock Photo Problem
Stock photos have three problems that nobody fixes.
The first is generic quality. You search “WordPress dashboard” and get the same 20 images everyone else sees. The blue-tinted laptop on a desk. The hands typing on a keyboard. The abstract technology background with floating icons. Your blog post ends up looking like every other blog post in your niche because you all pulled from the same pool.
The second is time. Finding the right stock photo is slower than most people realize. You need something that matches the content, fits the layout, is not overused, has the right composition, and does not require heavy editing. That search takes 15 to 20 minutes per image when you are being selective. When you are in a rush, you grab whatever is close enough, and the result looks like it.
The third is cost. Free stock sites have limited selection. Paid sites charge $20 to $30 per month for decent access. Premium individual images cost $5 to $15 each. If you publish frequently and need multiple images per post, the subscription costs add up alongside the time costs.
None of these problems are catastrophic on their own. But together, they mean you are spending real time and real money on images that look average and identical to your competitors.
What AI Image Generation Actually Looks Like
When I first heard “AI image generation,” I pictured typing a sentence and getting back a weird photorealistic face with seven fingers. That is not how it works for content visuals.
vLake’s image generation system is built for specific use cases. You do not just type a prompt and hope. You choose from 18 image categories. Blog featured images, infographics, social posts, hero banners, product showcases, and more. Each category optimizes the output for that use case.
Then you pick a style preset. Flat design for editorial content. Isometric for tech illustrations. Line art for minimal visuals. Watercolor for creative posts. There are 17 presets, and each one produces a consistent visual language.
You also control the aspect ratio. Square for in-article images. Landscape for featured images and social cards. Portrait for tall infographics.
The actual prompt describes what you want the image to show. Not “make me a nice picture.” Something specific: the data you want visualized, the layout, the text that should appear, the colors. The more specific you are, the closer the output matches what you need.
This is not random AI art. It is structured image generation with controls that match what a designer would think about: use case, style, composition, and content.
The Workflow Difference
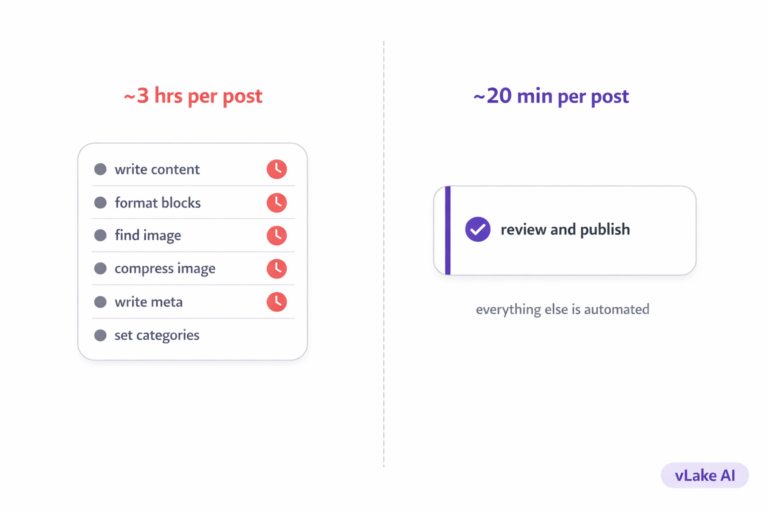
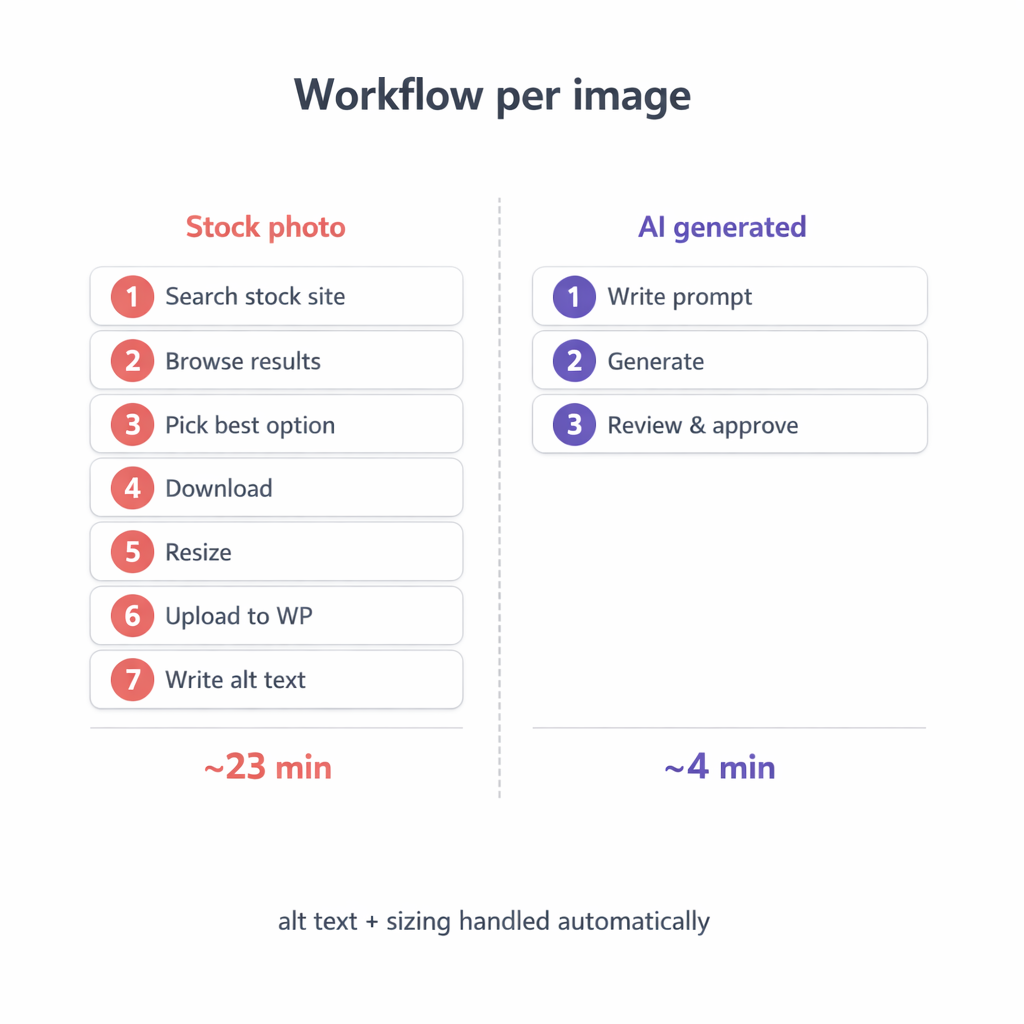
Here is what my old stock photo workflow looked like for one blog post image:
- Open a stock photo site (2 min)
- Search for relevant terms (3 min)
- Browse results, open tabs for candidates (8 min)
- Choose the best option (3 min)
- Download and resize to the right dimensions (4 min)
- Upload to WordPress (1 min)
- Write alt text manually (2 min)
Total per image: about 23 minutes. For a post with a featured image and two in-article images, that is roughly 45 minutes of image work.
Here is what the AI workflow looks like:
- Describe the image in a prompt with specifics (3 min)
- Generate (30 seconds)
- Review and approve (1 min)
Total per image: about 4 minutes. Alt text is generated automatically. The image is already in the right dimensions because you chose the aspect ratio upfront. No downloading, no resizing, no uploading from an external source.
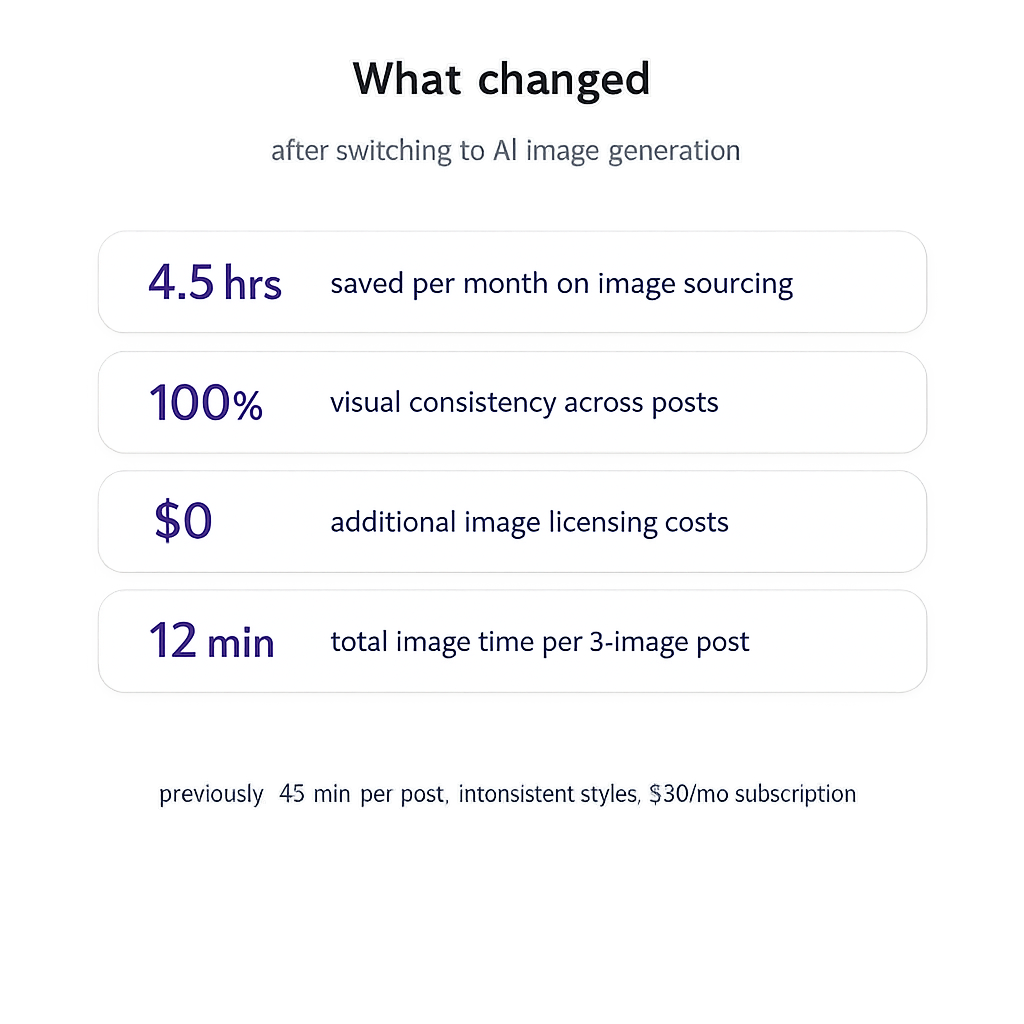
For a three-image post, that is 12 minutes instead of 45. Over a month of twice-weekly publishing, I saved roughly 4.5 hours on image sourcing alone.
What Changed for My Content
The time savings were obvious. But there were three other changes I did not expect.
First, visual consistency. Every post now uses the same style preset and color palette. My blog looks like one brand, not a collage of different stock photo styles from different photographers. Readers notice this even if they cannot name what changed.
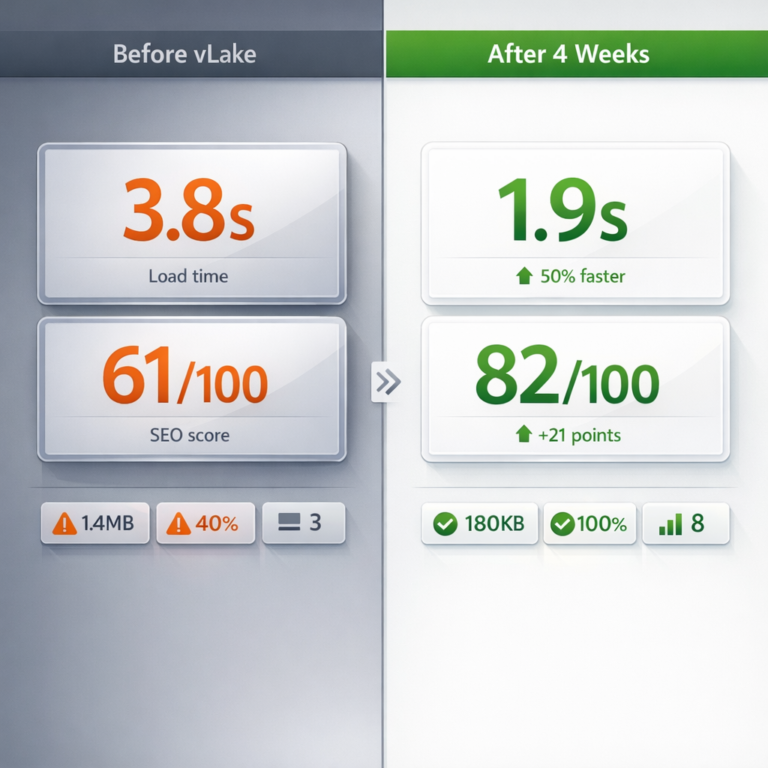
Second, content-matched images. Stock photos are generic by nature. They cannot show your specific data, your specific workflow, or your specific before/after comparison. AI-generated images can. When I write about a page speed improvement from 3.8 seconds to 1.7 seconds, the image shows exactly those numbers. The visual matches the content instead of approximating it.
Third, no licensing headaches. Stock photo licenses have rules about usage, attribution, and redistribution. Some free sites require attribution. Some paid licenses restrict how many times you can use an image. AI-generated images are yours. No licensing terms to track.
When Stock Photos Still Make Sense
I am not anti-stock. There are cases where stock photos are the right choice.
Product photos that need to show a real physical object. Team headshots for an about page. Location-specific images for a travel or real estate site. Event photography. Anything where the value is that the photo shows something real.
AI generation is not good at producing photorealistic images of specific real-world subjects. It is excellent at editorial illustrations, data visualizations, concept graphics, and branded content visuals. For those categories, it is faster, cheaper, and better than stock.
My rule is simple: if the image needs to show reality, use a photo. If the image needs to communicate a concept, generate it.